
Setting Up OpenEHR on Azure
Published by John Meredith on September 4th, 2017
Or "Adventures in Archetyping"...

No, not the 80's tale of high jinx and poor child managment starring a too young Vincent D'Onofrio. But the very real experience where you go two steps forward and one step back for a period of time, but refuse to give in. This was a bit of fun. Sort of like pulling teeth fun, but we got there in the end. I learned a lot about Azure in the process, and also that they have some helpful tech support so hat's off to them!
The aim was to get an OpenEHR Clinical Data Repository up and running in the cloud. I learned of Azure's support for Docker which is an attractive option for the NHS for a few reasons. Firstly it is officially supported by Microsoft and the NHS Wales Informatics Service is ostensibly a Microsoft shop and then there's the scalability offered by Docker containers.
Mocking up a test harness on Azure to get our fingers dirty was the goal and so we looked at EtherCIS, an open source implementation of OpenEHR which happened to have a Docker repo on GitHub. Putting these two together should be easy, right?
The Setup
First up, we need to set up the container. There's a great guide written by Lee Stott over at MSDN which was my launchpad. I'll recreate many of his steps here but credit where it is due. I was using Windows initially so you may have workarounds for Linux or macOS but hopefully you will be able to go from start to finish and end up with a working Clinical Data Repository in the cloud.
Step 0: Install Docker for Windows
Head over to https://docs.docker.com/docker-for-windows/install/ and get it installed. This is to allow you to open a local console and issue lovely commands to your container.
Step 1: Create the SSH Key
The Azure Container Service requires a public/private key to authenticate your local client. I used Putty but other key generators are available. Launch PuttyGen and select 'Generate'. PuTTY will ask you to wiggle the mouse around to generate random data for the key and present something similar to this:
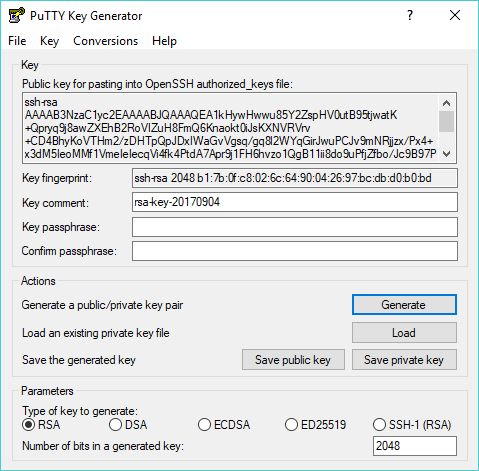
Save both the public and private key's somewhere safe and don't worry about saving the private key with a passphrase when PuTTY prompts you.
Step 2: Configure the Azure Container

The Azure Container Service (ACS) has changed a little since Lee's post so I will go through step by step from here. The main difference is now there is a Docker native swarm orchestrator depending on the region you set your container up in. Log into Azure Portal and create a new ACS.
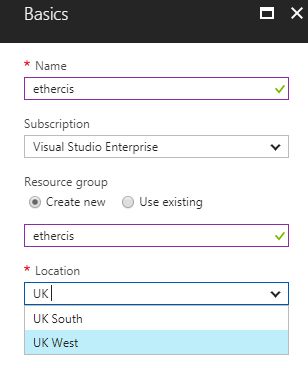
Complete the 'Basics' by giving it a name and selecting a location. I'm using 'UK West' because it is close to home.
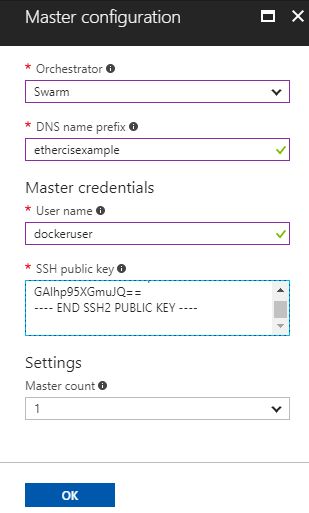
Next complete the Master Configuration. User the 'Swarm' orchestrator, give it a DNS prefix and create a user name that will authenticate with the SSH public key you created earlier. Keep the "Master count" at 1.
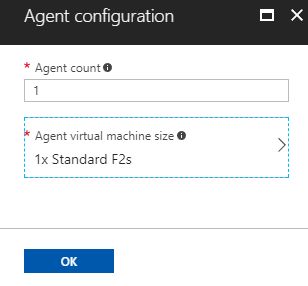
The Agent configuration comes next. For this example I am only using 1 agent but this is where you could scale up if needed, depending on your requirements. Select a virtual machine size to suite your wallet. For setting up the test harness we went with as cheap as possible! The trials and tribulations burned through my Azure credits fairly quickly...
The Summary screen is then presented with your configuration. Once validation has passed, click OK and then the Azure Oompa Loompa's will get to work. Best make yourself a cup of tea at this point.
Step 3: Download EtherCIS (and tweak it!)
I used the Windrows Github Client to clone the repo at https://github.com/alessfg/docker-ethercis but you can manually download it and save to a local folder. For reference, my forked repository with the tweaks made can be found here.
I will save you the long story about how we could not get the EtherCIS container running on Azure but essentially the EtherCIS build worked great if you installed it on a local PC running Docker. This was because the configuration of the EtherCIS container was asking the application to publish the service with a hostname configuration of 'hostname', which a local install can deal with. The problem occurred only with the architecture of the Azure Container Service.
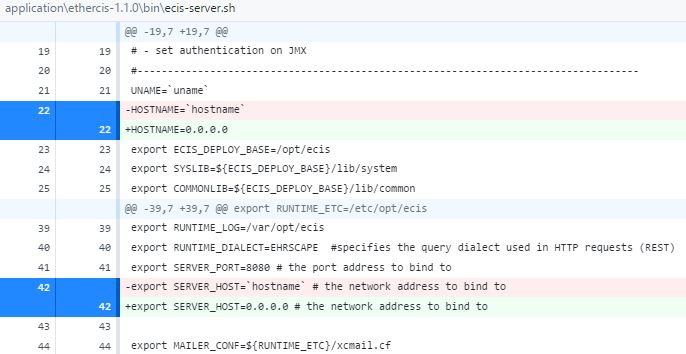
Change the \docker-ethercis\application\ethercis-1.1.0\bin\ecis-server.sh as follows, replacing 'hostname' with 0.0.0.0:
Line 22: HOSTNAME=0.0.0.0
Line 42: export SERVER_HOST=0.0.0.0 # the network address to bind to
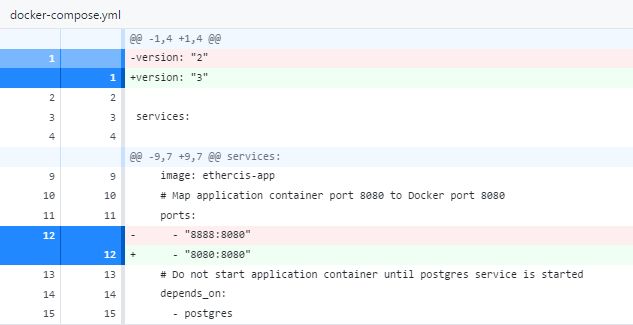
Then change the \docker-ethercis\docker-compose.yml on lines 1 and 12 as follows;
Line 1: version: "3"
Line 12: - "8080:8080"
NOTE: There are resources available to bring up the Docker container on specific ports (such as Juilian Corioland's article here). I'm too much of a newbie to Docker but if anyone has a view on how to get the Docker repo working, please get in touch.
The changes force the service to listen on 0.0.0.0 to speak to the swarm master.
Step 4: Configure Putty
This step is pretty close to the original post but essentially you need to configure it to point to the newly created ACS. Check back at Azure Portal which should be finished now, and browse to the Virtual Machines blade. Here you will see your newly created container service corresponding to the resource group you specified earlier. Click the name hyperlink and you will be presented with some configuration information.
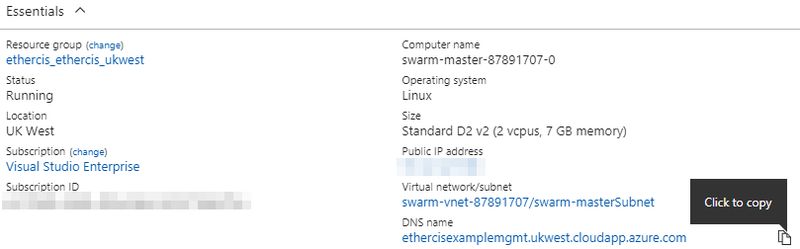
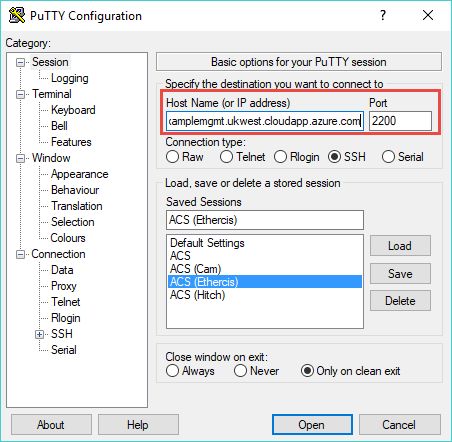
Hover over the right of the DNS name and 'Click to copy'. Now open up PuTTY. Create configuration similar to the next shot ensuring the Host Name is pasted, and the port is changed to 2200 to ensure load balancer can listen out.
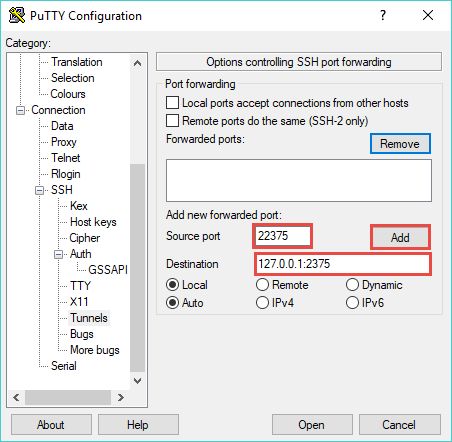
Navigate through the tree down to Connection > SSH > Tunnels to set the port forward so locally committed Docker commands on port 22375 will be sent to the Azure service where the swarm is listening on port 2375. Don't forget to click add.
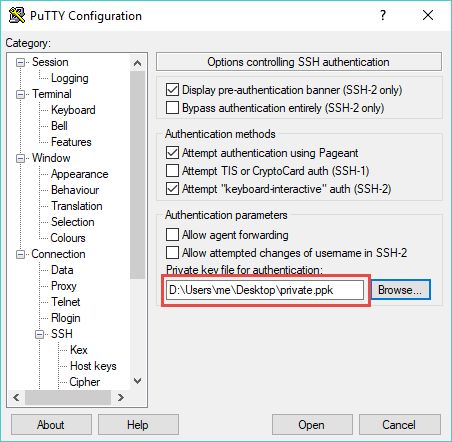
Finally point PuTTY at the private key you created earlier.
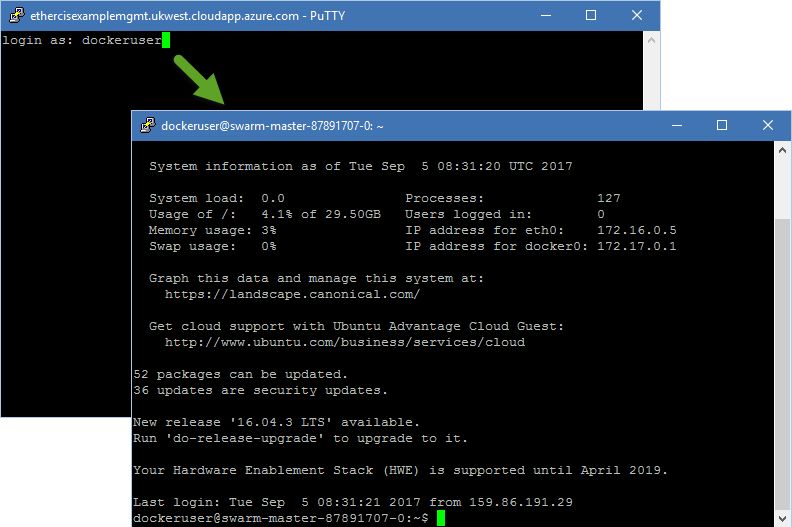
Once that is set, select Open. You will be prompted to save the security key which you can confirm. The Login terminal will now appear:
Step 5: Set the port forward
Navigate to the downloaded EtherCIS repo and open a Command Prompt. Enter the following command:
$ set DOCKER_HOST=tcp://127.0.0.1:22375
The terminal will not give you any response if the command is successful but don't worry.
Step 6: Build EtherCIS with Docker Compose
EtherCIS was build with Docker Compose. This really takes a lot of the headaches out of the deployment providing you make the correct changes above. The next step is really easy, just run the command:
$ docker-compose up
Docker will then begin deploying EtherCIS, and downloading JAVA and Postgres. When it is finished, you will see a message such as:
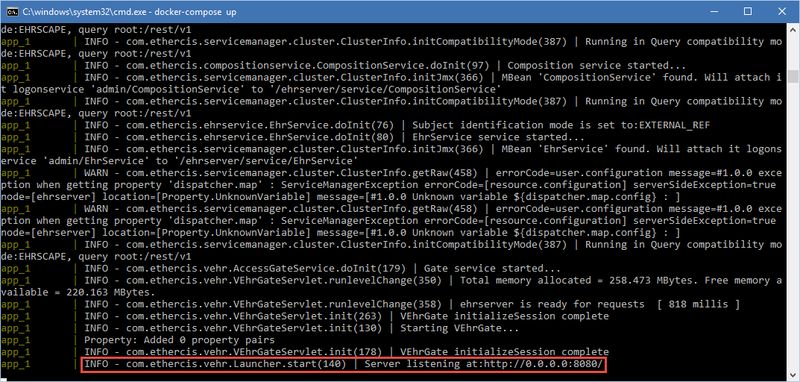
Step 7: Test your EHR
Now the real fun begins! First step is to check that the server is responsive. From Azure portal, find the 'resource groups' blade and select the deployment that contains the swarm agent. In the current (at the time of writing) portal, this will be amongst a bunch of resources. The agent will be denoted as a 'Public IP address' type.
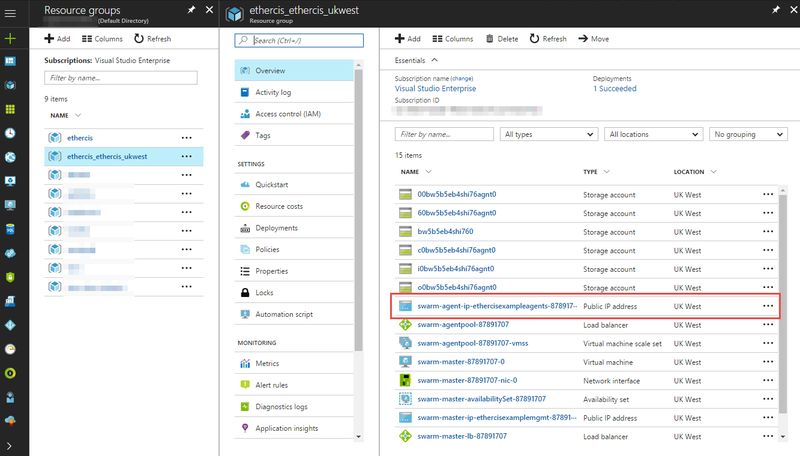
Select this and then copy the DNS name. For this install, we have not opted for a fixed IP and so the DNS will suffice.
Why aren't we using the Agent and not the Manager? Well, that would defeat the point of using a load balancer but this is something that I had to understand during the trouble shooting process.
Next, open a web browser and point the browser to the URL, adding the following to the end:
:8080/rest/v1/template
So the final URL should be something like this:
http://yourdns.azureregion.cloudapp.azure.com:8080/rest/v1/template
Which should get you:
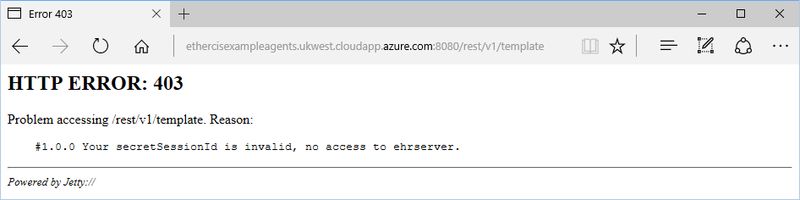
Result! You have a functional OpenEHR server (which incidentally does not trust you right now to do anything with it)! I'll revisit this blog with some examples on how to make use of the EtherCIS REST API soon.
Appendix
At the top of this post I gave a shout out to the Azure Support team. They were pleased to hear it apparently...
We're delighted to hear that! ^PC
— Azure Support (@AzureSupport) July 26, 2017

Posted on September 4th, 2017